- 来源:广州市广精精密仪器有限公司
- 时间:2011-07-29 13:17:10
- 字体:大 中 小
- 阅读:
英国Renishaw XL-80激光测量系统

新型Renishaw XL-80激光测量系统为坐标测量机和机床等运动系统提供高性能精度校准。
XL-80系统快速、精确、非常轻便,保留了Renishaw ML10在日常使用中所表现出的高精度、可靠性和耐用性等重要优点。XL-80与先进的软件解决方案和优异的性能相结合,可以提高贵公司的经营业绩。
XL-80激光干涉仪的主要优点
Renishaw设计、制造和供应激光系统已有二十多年的历史。XL-80是这些设计和制造丰富经验的结晶,具有真正领先的系统性能和操作优点。
| 便携性和易用性
XL-80激光和XC-80补偿器体积小巧,一套完整的线性测量系统装在一个“便携箱”中,重量仅12公斤。再加一个三脚架(装入尼龙拉链携带箱中),您就有了一个真正便携的机器测量方案。激光和补偿器均可通过USB与PC机连接,因此无需单独的接口,也无需担心复杂的设定。 |
|
| 精度和动态性能
精确稳定的激光源和准确的环境补偿,保证了±0.5 ppm的线性测量精度。读数以50 kHZ频率读取,最高线性测量速度可达4 m/s,即使在最高速度下线性分辨率仍可达1 nm。所有测量选项(不仅是线性)都采用干涉仪测量,使您对记录数据的精度有信心。 |
|
|
使用方便 XL-80设定和使用快速简便,减少了等待时间,增加了用于测量的时间,同时保留了纯粹干涉测量系统精度高的优点。
|
 |
| 全面信心
优质揑设计、惂憿榓媄术巟帩惀Renishaw揑标巙惈摿惇。不管测量的是微米还是纳米,最先进的设施和质量保证都极为重要。标准的三年保修期和全球支持网络体现了我们对您的承诺。 |
 |
激光校验机器的优点
提高机器的正常运行时间 不管使用哪种机器或运动系统,在开始切削或加工材料或测量部件之前,您都需要知道设备运行是否正常。 您可以了解机器定位性能的每个特性随时间发生变化的详细情形,预测某特定机器何时需要维修并预先建立应急计划。
提告机器性能
通过有针对性的维护和误差补偿,Renishaw的性能测量设备可确实提升机器的性能。
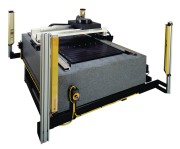 增强对机器或加工能力的了解
使用适合工作要求的机器 — 把工作安排给能够达到公差要求的机器,确保机器适合工作要求并且废品率较低。
证明机器性能
当客户需要对您的机器质量或工艺树立信心时,校准曲线和定期性能评估结果将是最好的证明。它们能够赋予您宝贵的竞争优势,使您领先于那些没有进行这些测试的制造商。
符合质量保证规程和标准
ISO 9000系列质量标准要求采用公认的、可溯源的系统和方法对生产和检测设备进行校准、监视和控制。
提供专业的维护服务
高质量的售后服务不可或缺。在用户现场使用与系统原始制造商在其工厂内使用的相同校准工具进行校准,这是使机器恢复为制造商原始规格的最佳方法。
XL系统组件
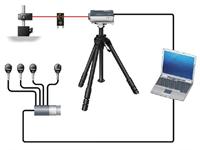 The basis of the new system is a compact laser head (XL-80) and an independent environmental compensator system (XC-80). A tripod and stage may also be required depending upon the application.
Together with measurement optics and software they form a highly accurate measurement and analysis system that can be stored and transported in one of the optional custom designed storage/transport cases.
XL-80 laser unit
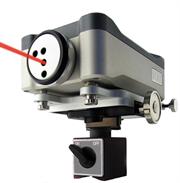 The XL-80 laser produces an extremely stable laser beam, with a wavelength that is traceable back to national and international standards.
- Laser frequency stability ±0.05 ppm over 1 year and ±0.02 ppm over 1 hour is achieved by dynamic thermal control of the laser tube length to within a few nanometres.
- Linear measurement accuracy ±0.5 ppm over the whole environmental range ie, from 0 ºC - 40 ºC (32 ºF - 104 ºF) and 650 mbar - 1150 mbar. Readings can be taken at up to 50 kHz, with a maximum linear measurement speed of 4 m/s and a linear resolution of 1 nm; even at maximum speed.
- Integrated USB means there is no requirement for a separate laser-to-PC interface.
- LED status lights indicate the laser status and signal strength, providing a convenient alternative to the software’s “on-screen” indicators.
- Switchable between standard (40 m) and long (80 m) range modes.
- Analogue I/O port allows for analogue signal output and a trigger signal input.
- Warm-up time is less than 6 minutes.
- External, switch mode power supply ensures 90 V - 264 V flexibility in input voltage.
All of the above features make the XL-80 quick and easy to use.
 In accordance with (IEC) EN60825-1, Renishaw XL-80 lasers are Class 2 lasers and safety goggles are not required. Always refer to the system manual for safety details before operating the system for the first time.
XC-80 compensator and sensors
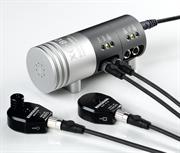 The XC-80 compensator is a crucial factor in your XL system’s linear measurement accuracy. Featuring “intelligent sensors” that process the readings at source, the compensator very accurately measures air temperature, air pressure and relative humidity. Changes in these conditions can effect the wavelength of the laser light and the measurement readings taken.
The XC-80 uses the sensor readings to modify the nominal value of the laser wavelength to give a true value, which is then used in calculations to virtually eliminate any measurement errors resulting from these variations.
If you are interested in accuracy you NEED effective wavelength compensation.
Key features of XC-80 include:
- Uniform compensation - The design of the XC-80 and sensors ensures uniform and extremely accurate readings over the full range of environmental operating conditions.
- Frequent sensor updates - This can be done automatically every seven seconds, as indicated by LED status lights on the XC-80 unit.
- Integrated USB - The inetgral USB connection means there is no separate PC interface and no separate power supply (the USB supplies the XC-80 and sensors' power).
- Lightweight - The XC-80 weighs 550 g, and together with the XL-80, weighs just over 3 kg (including connecting cables, XL power supply and sensors).
- Intelligent air and material temperature sensors - The integral microprocessors analyse and process the sensor's output before sending digital temperature values to the XC-80 compensator. This offers more secure measurements and is a key reason why the XC-80 is so compact and also ensures sensors are fully interchangeable without comprimising accuracy.
- Up to three material temperature sensors can also be attached to the XC-80 compensator to allow linear measurements to be normalised to a standard material temperature of 20 °C.
- Versatile sensor cables - The standard 5 m long sensor cables are detachable for easy replacement and can be screwed together for extended lengths on longer machines.
Note: Environmental compensation is NOT required for angular or straightness measurements when using a Renishaw system as these are calculated from differences in two beam paths close together, where the environmental factors self cancel. As rotary axis, flatness and squareness measurements are also based on these measurements they also do not require environmental compensation.
Tripod and stage
Unless you are using a dedicated measurement rig, then you are likely to need a mounting stage (and in most cases a tripod) to adjust the laser’s position relative to the desired measurement axis.
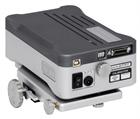 The XL mounting stage allows for precise angular rotation and translation of the XL-80. It is designed to be left attached to the laser unit for easy storage and quick set-up.
- A "quick fit/release" mechanism enables rapid and secure fixing to a tripod. For those applications where tripod mounting is not convenient, e.g. for mounting directly on a machine tool table, the stage and laser can also be mounted on to most standard magnetic bases, using an optional adapter with M8 thread.
- The new Universal tripod has been extensively tested to provide a stable, adjustable base in a compact, lightweight unit.
性能和测试
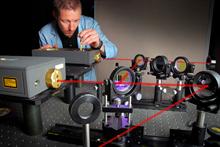 All of Renishaw's experience in metrology and laser interferometry is to be found in each and every measurement system that it produces. Our aim is to deliver the specified accuracy, with full traceability and confidence that the laser system will continuously deliver that accuracy day-after-day where it counts, in the workplace.
All lasers and ballbars are calibrated at the Renishaw factory against reference systems with traceability to national standards.
System performance

Performance specifications are verified to international procedures against a documented system error budget, with system accuracy quoted to 95% confidence level (k = 2), which is valid across the full environmental operating range.
Without reliable and accurate wavelength compensation, errors of 20 ppm - 30 ppm would be common. Great effort has been taken to ensure Renishaw’s XC-80 compensation system and sensors are accurate across the entire operating range of the system. It is this that maintains ±0.5 ppm linear measurement accuracy from 0 ºC - 40 ºC (32 ºF - 104 ºF) and over the full air pressure range.
| Linear measurement range | 80 metres |
| Linear measurement accuracy | ±0.5 ppm |
| Linear frequency accuracy (1 year) | ±0.05 ppm |
| Resolution | 1 nm |
| Maximum travel velocity | 4 m/s |
| Dynamic capture rate | 10 Hz - 50 kHz * |
| Preheat time | < 6 minutes |
| Specified accuracy temperature range | 0 °C - 40 °C |
| Storage temperature range | -25 °C to +70 °C |
Environmental sensor performance
| Sensor | Range | Accuracy |
|---|---|---|
| Material temperature | 0 °C - 55 °C | ±0.1 °C |
| Air temperature | 0 °C - 40 °C | ±0.2 °C |
| Air pressure | 650 mbar - 1150 mbar | ±1 mbar |
| Relative humidity (%) | 0 - 95% non condensing | ±6% RH |
* Choose one of 12 pre-defined capture rates.
XL-80所用的测量光学镜组
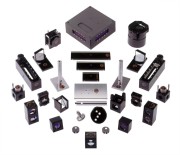 Renishaw measurement optics enable you to measure linear, pitch, yaw, horizontal and vertical straightness along any axis. Additional optic kits are available to enable measurement of surface flatness and squareness of axis.
The same optics can be used with XL-80 or ML10 systems, ensuring consistency of measurement set-ups and procedures. All measurements are interferometric and therefore use the traceable international standard wavelength of laser light, allowing you to have total confidence in the results.
For rotary axis calibration, please see RX10 rotary axis calibration section and for other optical accessories to assist in set-up and measurement, please see the optics accessories section.
Features and benefits
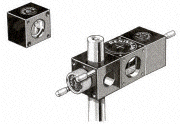 Interchangeable - The unique design of linear, angular and straightness optics enables easy interchange for different measurements, without having to re-align the laser.
Convenient - Moving optics have no cables to drag or snag, for best accuracy and convenience.
Low mass aluminium optics - The optics are manufactured in aluminium, therefore the optics' low mass is especially relevant if measuring pitch errors on horizontal arm CMMs and for dynamic measurements.
Quick acclimatisation - Some competitor systems use stainless steel optic housings. These are much heavier than Renishaw's aluminium optics and have a lower thermal conductivity, therefore taking longer to acclimatise to the shop environment.
Linear measurement optics kit
 Linear measurement is by far the most common form of measurement performed on a machine.
Each linear measurement optics kit contains:
- 1 linear interferometer
- 2 linear retroreflectors and clamp screws
- 2 alignment targets
| Part number | Description |
|---|---|
| A-8003-0440 | Linear measurement optics kit |
Specification
| Standard range | 0 m - 40 m (0 in - 1600 in) |
| System accuracy (when used with XL-80 system) | ±0.5 ppm (parts per million) |
| (when used with ML10 Gold Standard) | ±0.7 ppm |
| (when used with ML10, pre-Gold Standard) | ±1.1 ppm |
| Resolution | 0.001 µm (0.1 µin) |
| Maximum velocity | 4 m/s (9600 in/min) |
| Velocity measurement accuracy | ±0.05% |
For linear measurements over 40 m you will require the long range linear accessory kit
Angular measurement optics kit
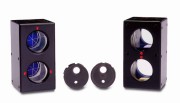 These optics allow angular pitch and yaw measurements to be made. Can measure maximum angular deflections of up to ±10° with resolution of 0.01 arc sec.
Each angular measurement kit contains:
- 1 angular retroreflector
- 1 angular interferometer
- 2 alignment targets
| Part number | Description |
|---|---|
| A-8003-0441 | Angular measurement optics |
Specification
| Axial range | 0 m - 15 m (0 in - 590 in) |
| Angular measurement range | ±175 mm/m (±10°) |
| Angular accuracy | ±0.6%* ±0.5 ±0.1M µ/mm (±0.6%* ±0.1 ±0.007F arc sec) |
| Resolution | 0.1 µm/m (0.01 arc sec) |
Where:
% = percentage of displayed value
M = measurement distance in metres
F = measurement distance in feet
* 0.2% accuracy available by special order
Linear and angular combination kit
 This optics combination kit is a cost saving alternative for users who wish to perform both linear and angular measurements.
Each combination kit contains:
- 1 linear retroreflector and clamp screws
- 1 angular retroreflector
- 1 angular interferometer
- 3 alignment targets
| Part number | Description |
|---|---|
| A-8003-2774 | Linear and angular optics combination kit |
Straightness measurement optics kit: 0.1 - 4 m axis length
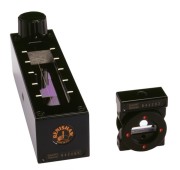 These optics allow the measurement of horizontal straightness error in linear axes up to 4 m in length to be made. They also enable axis parallelism to be measured.
Each short range straightness kit contains:
- 1 straightness interferometer
- 1 straightness reflector
| Part number | Description |
|---|---|
| A-8003-0443 | Straightness optics - short range |
Specification
| Axial range | 0.1 m - 4 m (4 in - 160 in) |
| Straightness measurement range | ±2.5 mm (±0.1 in) |
| Accuracy |
±0.5% ±0.5 ±0.15M2 µm (±0.5% ±20 ±0.5F2 µin) |
| Resolution | 0.01 µm (1 µin) |
Where:
% = percentage of displayed value
M = measuring distance in metres
F = measuring distance in feet
May require Universal (straightness) shutter or straightness accessory kit, depending upon application (see optics accessories section)
Straightness measurement optics kit: 1 - 30 m axis length
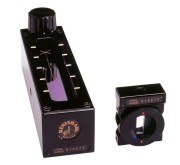 These optics can be used to measure the horizontal straightness error in linear axes from 1 m up to 30 m in length when using the XL-80 laser system. They also enable measurement for parallelism of axes.
Each long range straightness kit contains:
- 1 straightness interferometer
- 1 straightness retroreflector
- 2 alignment targets
| Part number | Description |
|---|---|
| A-8003-0444 | Straightness optics - long range |
Specification
| Axial range | 1 m - 30 m (40 in - 1200 in) |
| Straightness measurement range | ±2.5 mm (± 0.1 in) |
| Accuracy* |
±2.5% ±5 ±0.015M2 µm (±2.5% ±200 ±0.05F2 µin) |
| Resolution | 0.1 µm (10 µin) |
Where:
% = percentage of displayed value
M = measuring distance in metres
F = measuring distance in feet
* subject to environmental conditions
May require Universal (straightness) shutter or straightness accessory kit, depending upon application (see optics accessories section)
Squareness measurement optics
These optics  determine the out-of-squareness of two nominally orthogonal axes, by comparing their straightness slope values which are referenced via the optical square.
Note:
A straightness measurement optics kit and straightness accessory kit are also required to perform squareness measurements.
Each squareness measurement optics kit contains:
- 1 optical square and clamp screws
- 1 bracket (for adjustable turning mirror)
| Part number | Description |
|---|---|
| A-8003-0665 | Squareness measurement optics |
Specification
| Range | ±3/M mm/m (±2000/F arc sec) |
| Resolution | 0.01 µm/m (0.01 arc sec) |
Where:
M = measurement distance in metres
F = measurement distance in feet
Flatness measurement kit
 The flatness mirrors not only rotate horizontally, but also tilt to allow horizontal and vertical adjustment of the laser beam.
Note:
Angular optics are also required to perform flatness measurements.
Each flatness measurement kit contains:
- 2 flatness mirrors
- 1 50 mm flatness base
- 1 100 mm flatness base
- 1 150 mm flatness base
| Part number | Description |
|---|---|
| A-8003-0442 | Flatness measurement kit |
Specification
| Axial range | 0 m - 15 m |
| Flatness measurement range | ±1.5 mm (±0.06 in) |
| Accuracy |
±0.6%* ±0.02M2 µm (±0.6%* ±0.08F2 µin) |
| Resolution | 0.01 µm (1 µin) |
Where:
% = percentage of calculated flatness
M = length of diagonal in metres
F = length of diagonal in feet
英国雷尼绍新型XL-80激光干涉仪
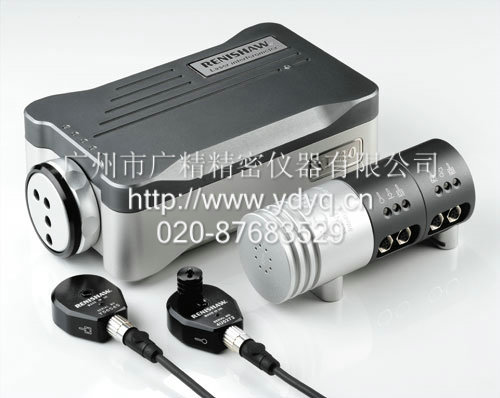
英国雷尼绍新型XL-80激光干涉仪详细介绍:
在超精密的测量和校准方面,激光干涉仪已经扮演多年极重要的角色。但是近年来随着自动化运动系统性能大幅提高,面对半导体和传统金属加工业的需求,现有激光系统的性能已无法满足一些客户的要求。
Renishaw的新型XL-80激光干涉仪能够满足和超越实际工业规范水平,提供4m/s最大的测量速度和50kHz记录速率。即使在最高的数据记录速率下,系统准确性可达到±0.5ppm(线性模式)和1纳米的分辨率,这些改进意味着工程师仍能使用可溯源性激光干涉的独特优势,帮助解决现代化机器设计问题。
系统精度比原有的对应产品ML10激光系统有所提升,在整个日常温度、气压和湿度不同工作环境下,均可达到±0.5ppm的精度。环境读数使用XC-80智能传感系统进行读取,每7秒更新一次激光读数补偿值。还有一点很重要,与Renishaw的ML10系统一样,所有测量值均采用稳定的氦氖激光源的波长为基准,保证能够溯源至国际公认的长度标准。
此新系统可以与现有的ML10系统光学镜组完全兼容,使目前全球数千ML10用户能够升级到新系统,并同时保留其在光学镜组、程序和人员培训上的原有投资。
我们还提供已更新的Renishaw软件版本(LaserXL?及QuickViewXL?),能够以用户熟悉的、易于使用的格式提供数据。LaserXL?能够执行循序渐进式的测量,以方便对大多数机床按标准进行检验,QuickViewXL?软件能够在屏幕上实时地显示激光读数。
您只要看一眼Renishaw的新型XL-80激光装置和XC-80补偿器,就会注意到它们比原有的ML10和EC10小了许多。现在,二者总重仅3公斤多一点(包括连接电缆、电源和传感器),比原来减轻了70%。当然,随着激光头和补偿器尺寸减小,其他系统组件,例如三脚架和云台也相应地减小以便相配,因此整个系统(除了三脚架)的装运箱减小了许多。现在,最小的“脚轮箱”只有原来箱子的一半大一点点,却可以携带整个线性和角度测量系统,并有放置RenishawQC10球杆仪组件的位置。这个高度便携的“检查和修正”系统总重不到15公斤,同类产品无以匹敌。
为了与系统的其他组件的便携性相匹配,我们设计了新型三脚架和装运箱,仅重6.2公斤。
激光头和云台体积很小,能够方便地固定在标准磁性座上,可以在不方便使用三脚架固定的应用条件下使用。XL-80激光测量系统的光束高度和光学镜组尺寸与ML10系统一样,因此也可以直接放在花岗岩工作台(不使用三脚架云台)上,进行坐标测量机的校准。
Renishaw已将激光的预热时间缩短至大约仅6分钟。预热速度较同类系统快,因此用户等待时间减少了,用于测量工作的几率增加了,这对于机器校准服务商和那些需要在一个地点执行多项测量的用户而言非常重要。
现在,信号增益的开启和关闭是一项标准功能,使其具有80米线性测量距离的能力。若短距离应用时,则可以提高信号强度。激光信号通过USB连线直接输出到电脑上(无需单独的接口),辅助功能端口可提供模拟信号及工厂按需设定的数字信号输出。
XL-80激光头的配置集原ML10G/Q/X多种任选功能于一体,功能更完善。
XL-80系统具有长达3年标准的全面保修,并可以以优惠的价格选购延长保修时间为5年。对于使用ML10的老用户和使用其他厂商制造的同类系统的新客户,我们均提供一些特别优惠政策。
- ·Micro-Hite 3D 手动三坐标测…
- ·MQ系列三坐标测量仪
- ·Geomagic Control X 三维检…
- ·双立柱式三坐标测量划线机
- ·侧挂型三坐标测量机
- ·单立柱式三坐标测量划线机
- ·644立柱悬臂型三坐标测量机…
- ·533型水平臂移动三坐标测量…
- ·Geomagic Wrap 3D扫描类逆向…
- ·MQ564S-手动机型三坐标测量…
- ·Helios-N系列测量臂
- ·Helios系列测量臂
- ·UG553系列复合式坐标测量机…
- ·UG422系列复合式坐标测量机…
- ·UG321系列复合式坐标测量机…
- ·Atlas-B系列三坐标测量机
- ·Atlas系列三坐标测量机
- ·ML系列三坐标测量机
- ·MGH-高精度系列三坐标测量机…
- ·Daisy564s手动三坐标测量机…
- ·MQ系列三坐标测量机
- ·Daisy系列三坐标测量机
- ·XL-80激光测量系统、激光干…
- ·球杆仪
- ·Rapidform三维逆向扫描软件…
- ·PolyWorks Inspector三维尺…
- ·Delcam PowerINSPECT三维测…
- ·Metrologic Group三维数模测…
- ·PolyWorks三维曲面检测软件…
- ·Geomagic Design X 逆向工程…
- ·德国蔡司DuraMax三坐标测量…
- ·德国蔡司UPMC ultra三坐标测…
- ·德国蔡司新型Spectrum三坐标…
- ·德国蔡司PRISMO navigator三…
- ·德国蔡司ACCURA三坐标
- ·德国蔡司全新ACCURA II三坐…
- ·德国蔡司 CONTURA G2三坐标…
- ·德国蔡司CONTURA G3三坐标测…

